upgrading this blog: image hosting and automated uploads
5 min read
·…
tl;dr:building an image host with qiniu cloud.
I have been tinkering with this blog again. The existing Hexo setup is convenient, but it still never quite felt right. After seeing several blogs with excellent front-end interfaces, I began to want a custom blog of my own.
Image storage was the first problem to address. The existing Hexo blog is deployed on GitHub Pages, where image-loading speed can be unstable because of network conditions. An image host solves that problem, which is why I am recording the setup here.
Image hosting and object storage
An image host is easy to understand: it is a storage platform for images, audio, and other assets, accessed through a consistent URL. Because it can use a CDN for acceleration, it is well suited to serving web assets quickly to users in different locations.
Image hosting has a mature operating model built on object-storage services. Major cloud vendors all offer it, such as Alibaba Cloud OSS and Tencent Cloud COS. After looking through the dizzying options—and especially their prices—I chose the cheapest option: Qiniu Cloud.
Creating the object store
After registering a Qiniu Cloud account, create a storage bucket. If a domain has not been registered in mainland China, only overseas storage can be selected. Overseas storage costs more and does not include the 10 GB monthly free tier, but it has no domain restriction. The bucket also needs to be public, otherwise other web services cannot access its image assets.
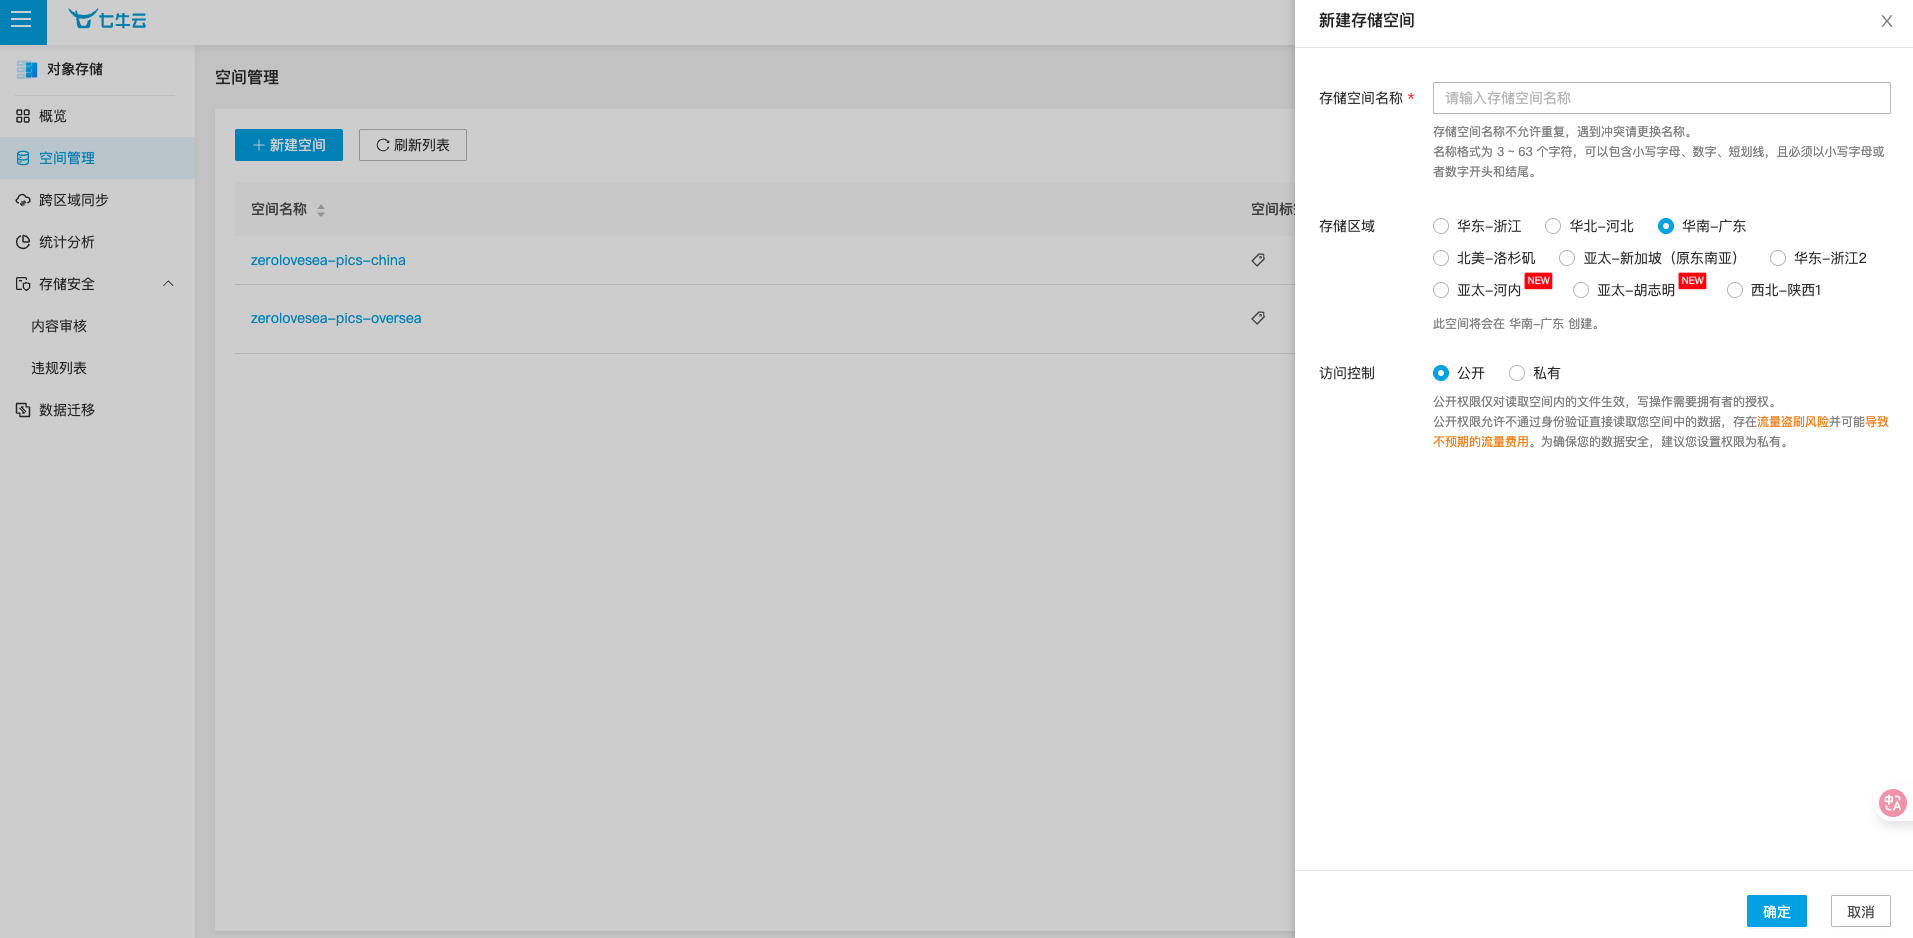
Once created, photos can be uploaded freely. Qiniu provides a temporary test domain, so an image can be accessed as domain/image-name (xxxx.com/test.jpg). After 30 days, however, you need to bind your own domain to continue using the image host.
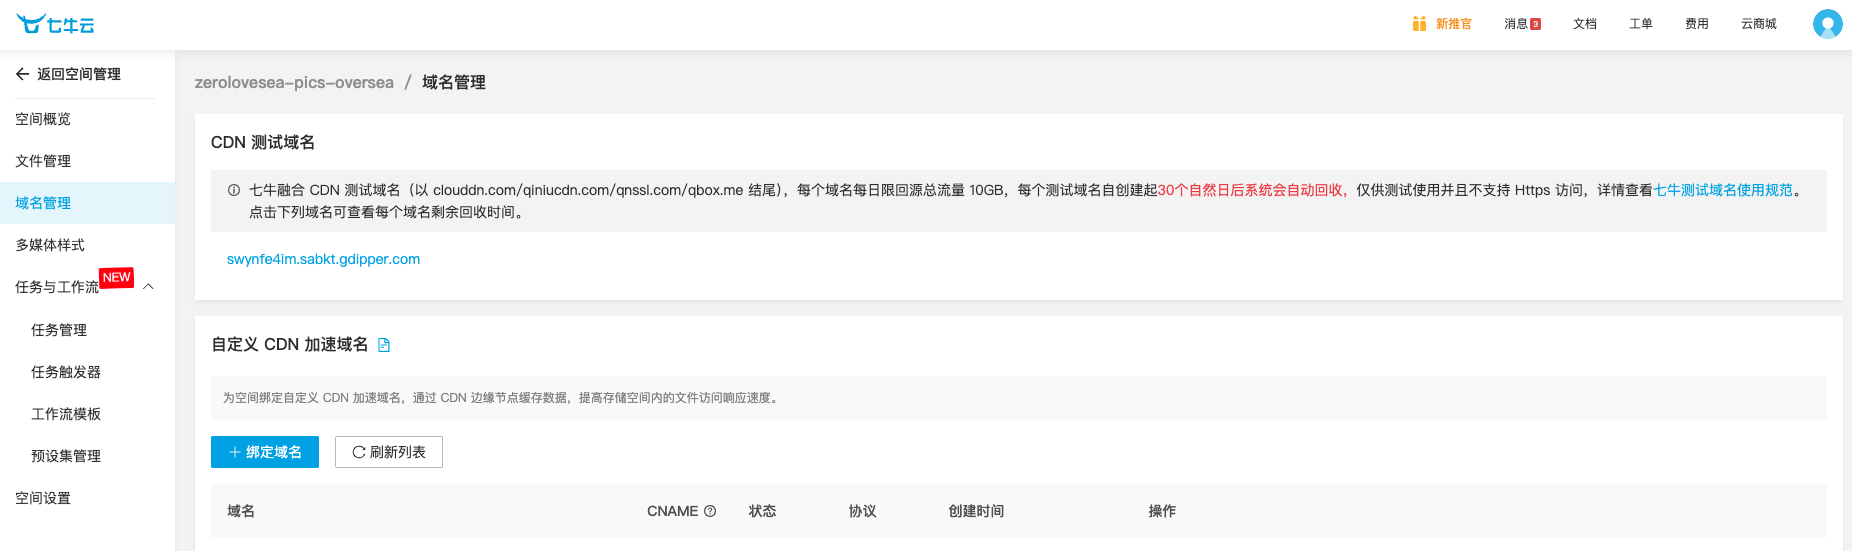
Binding a custom domain
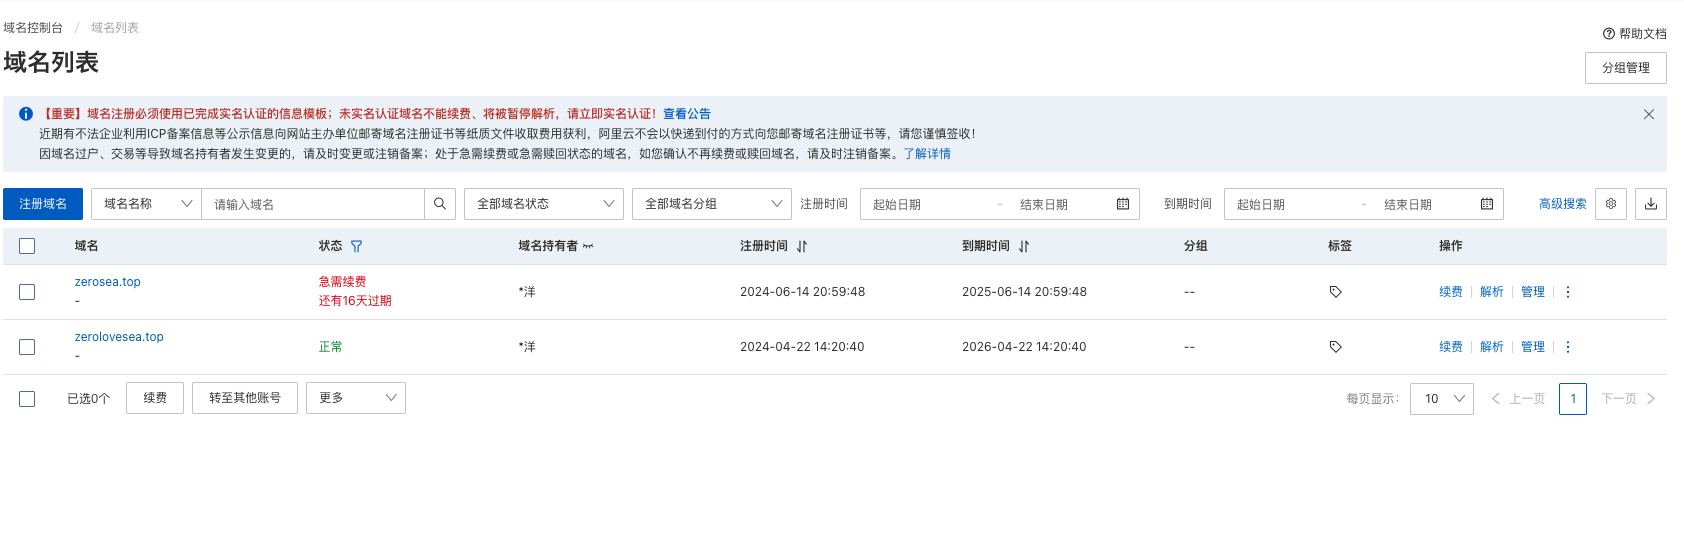
I own the Alibaba Cloud domain zerolovesea.top and wanted to bind the image host to images.zerolovesea.top. Go to the Alibaba Cloud console, open the domain list, and select the top-level domain to configure its DNS records.
- Add a CNAME record for the existing domain.
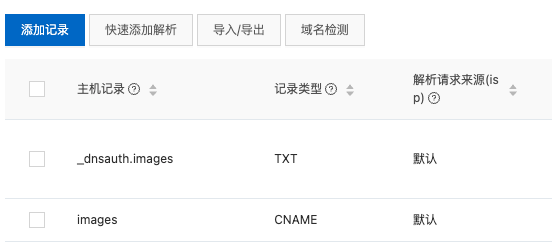
- To bind
images.zerolovesea.top, add animagesCNAME record. Its target value is provided by the object-storage platform while configuring the custom domain.
- In Qiniu Cloud, go to Domain Management → Custom Origin Domain → Bind Domain. Enter the subdomain and complete the configuration in order. An unregistered domain can only cover overseas regions.
- After configuration, Qiniu initially shows the CNAME as unconfigured. Copy the CNAME string it provides into the Alibaba Cloud DNS record for the subdomain, then wait a moment. The image host can then be accessed through your own domain.
Automatic uploads with PicGo and Typora
I write blog posts in Typora. When I insert images, Hexo turns relative paths into GitHub Pages URLs. With an image host, Typora can upload images automatically through PicGo.
On macOS, install it with brew install --cask picgo. On Windows, download the latest version from the PicGo GitHub releases page.
After installation, open Image Bed Settings, select the corresponding service, enter its details, and save. The required AccessKey and SecretKey are available under Qiniu Cloud → Key Management.
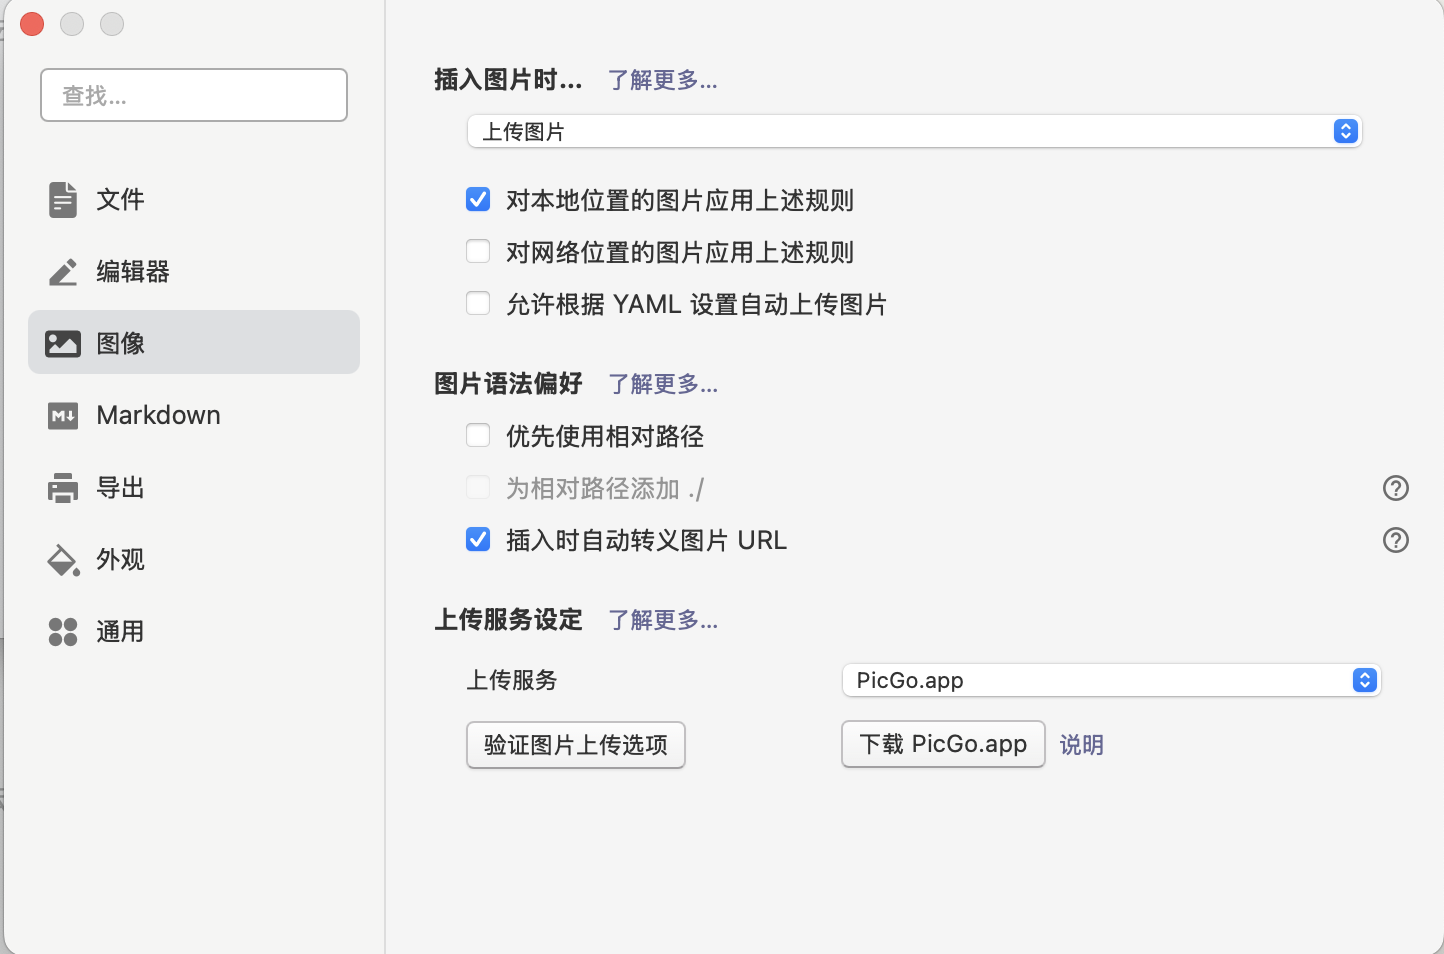
Then in Typora, open Settings → Image, set inserted images to upload automatically, and select PicGo as the upload service. Each time you paste an image, Typora uploads it first and inserts the image URL directly into the Markdown document, greatly reducing the work involved.
May 29, 2025, Suzhou